Thursday 25 May 2017

London off the beaten track – Skip Garden & Kitchen


Skip Garden and Kitchen


London is a city that never ceases to surprise me. Last week, I went with my sister to meet a friend for lunch at “a green oasis” in the middle of the massive King’s Cross regeneration development: the Skip Garden Kitchen.  Before getting to the food, I’ll tell you a bit about the place. It presents itself as a “moveable sustainable urban vegetable garden built in skips”. It’s moveable because it temporarily occupies a plot of land amidst the construction work which is earmaked for development. When the heavy machinery and the army of builders arrive, the garden and kitchen relocate to another plot within the area. Their current location is the fourth and possibly the last one on this site.

It’s a nice community project that involves not only young local people but people of all ages, who help with growing the vegetables and herbs, making furniture (everything is built using recycled materials, mostly from the building site around it), making jams and pickles, looking after beehives and chicken coops etc. It’s a project that excited us.

The food at the café is simple and hearty, made with some of the produce that is grown locally in the skips and pots. They make everything in their small kitchen and the menu changes daily. You can walk around the garden, eat al fresco at a communal table, or shelter inside the shack if the weather is challenging. There is a larger space above the café with a little balcony that they hire for private functions.

The whole place is full of little surprises created with the recycled materials – some of the pieces are designed by students from the neighbouring Central Saint Martin’s School of Art. The toilets are well looked after, which is always a good sign. So, if you are in the King’s Cross area or thinking about exploring, do pop in at Skip Garden for lunch or for a coffee and cake. You can, in the process, enjoy the walk around the new regenerated area.


Veg and herb garden built in skips.
Mini veg and herbs pots.
Clean toilets.
A partial overview.
Greenhouse made with recycled sash windows.
The funky chicken coop.
Some of the food served at the cafe.


Back in my kitchen

Lunch next day at my home was inspired by the food and the produce from the Skip Garden.

Vibrant salad to enjoy al fresco.
Flavours and vitamins galore...

...finished with my savoury granola.
  

Roasted beetroot salad with goat’s cheese, orange and fresh leaves
Serves 4 as a side dish or 2 as a light main course

Ingredients

4-5 medium sized organic beetroots, quartered
2 medium organic oranges, sliced
180g goat’s cheese log, sliced
110g organic salad leaves of your choice
Savoury granola for sprinkling (see recipe here), as you like it
Extra virgin olive oil, for drizzling
salt and pepper

Method

Pre-heat the oven to 200°C. Trim and wash the beetroots really well. Keep the skins on. Place them in an oven tray, drizzle some olive oil and season with sea salt and pepper. Cover the tray with aluminum foil and roast in the oven for approximately 1 ½ hour or until tender. Remove from oven and let them cool.  

Assemble the leaves, beets, oranges and goat’s cheese on a salad dish. Sprinkle over it the savoury granola and drizzle with some extra virgin olive oil. I didn’t make a dressing for it as the spices in the granola, the juice of the oranges and the olive oil all add a lovely flavour when mixed together. It’s colourful, earthy, crunchy and fresh.  A really flavoursome dish. Enjoy!

A healthy note: This salad contains lots of fibre (which helps lower cholesterol and improves  blood glucose control),  and good fats (great for your skin health). It’s a good balanced meal. I’ve already written about the benefits of beetroot here.

Till next week!
Share:

Thursday 18 May 2017

Granola for all taste buds


My breakfast meal routine tends to be more of a savoury choice than a sweet one.  But with summer approaching, I always make a big batch of granola to enjoy with berries and seasonal fruits. These days we can find great choices of granola in the market without the old sugar-laden brands, but I still think they are quite sweet. Plus, it is cheaper and tastes a lot better, if I say so myself.

I like making my own because I can also play with flavours and spices. To entertain my salty taste buds, I make the savoury version which we can enjoy as a healthy snack or just sprinkled over salads or soups. 

I am sharing now with you some of the batches I made this week. You can make your own granola with nuts and seeds of your choice. Try experimenting with spices, dried fruits, peanuts and whatever takes your fancy.

Dry and wet ingredients before mixing.
All mixed together.
Put the mixture in a tray...
and let it bake until lightly toasted.
Granola with tahini and spices.
Enjoy it with fresh berries, yogurt and a drizzle of maple syrup, if you like.

Granola with tahini and spices (makes about 750g)

Ingredients

200g organic jumbo oats
100g organic pecans, broken
100g organic Brazil nuts
30g organic pumpkin seeds
50g organic mix of seeds (flaxseed, sunflower and sesame)
30g organic sunflower seeds
160g organic coconut flakes
1 ½ teaspoon masala chai mix (or ½ tsp of cardamom powder, ½ teaspoon cinnamon powder and ½ teaspoon ginger powder)
80ml organic extra virgin olive oil or organic coconut oil
10g organic tahini
¼ teaspoon vanilla extract (optional)
50ml organic blackstrap molasses or maple syrup

Method

Pre-heat the oven to 180°C. In a big bowl, mix all the dry ingredients. In a small bowl, mix the oil, tahini, molasses and vanilla extract. Drizzle over the dry ingredients. Spread the mixture on a baking sheet. Bake for 15-20 minutes or until lightly roasted. Check every 10 minutes to make sure it is not burning. Serve with organic yogurt (Greek or plain natural, or Kefir), fresh fruits of your choice and a drizzle of maple syrup or honey.
Keep it in an air-tight container.

Mix all ingredients together.
Place it in a baking tray.
Ready to be snacked at.


Savoury spicy granola (makes about 300g)

Ingredients

150g organic cashew nuts
100g organic pumpkin seeds
100g organic mix of seeds (flaxseed, sunflower and sesame)
30g organic quinoa puffs (you can use *puffed rice, buckwheat or oats instead)
10g organic molasses
25ml organic extra virgin olive oil or organic coconut oil
1 teaspoon organic turmeric powder
¼ teaspoon cayenne pepper (increase amount if you prefer a more spicy mixture)
Himalayan salt 

*quantity may vary

Method

Pre-heat the oven to 180°C. In a big bowl, mix all the ingredients. Spread the mixture on a baking sheet. Bake for 15-20 minutes or until lightly roasted.
Keep it in an air-tight container.

A healthy note: nuts and seeds are a great source of protein, essential fats, vitamins and minerals. They are high in insoluble fibre, which is beneficial for regular bowel movements. Flaxseeds are high in omega-3, which studies have shown can help regulate and reduce blood pressure in people with hypertension. The seeds also contain a compound called lignan, which is very beneficial for balancing hormone levels in the body.

Oats help reduce LDL (“bad” cholesterol), lower blood pressure, and provide sustained levels of carbohydrates for the production of energy. Oats can cleanse your intestinal tract and your blood. They also help to stabilize insulin levels.

Till next week!
Share:

Thursday 11 May 2017

An easy Sunday lunch


My favourite way to start a Sunday

Sunday in our household is normally a day to chill, to catch up on tasks that are overdue, to see or have friends over for lunch. This Sunday, we had friends coming over and as they were vegetarians the idea of cooking a typical Sunday roast was off the menu. I was also feeling a bit under the weather so my lovely and helpful husband decided to take over the kitchen.

Dean is a good cook but when he learns a dish he tends to stick with it forever - a repertoire of about five. About 2 months ago, I suggested he should learn to cook a new dish. I showed him a new recipe and then he set about trying to master it. He cooked it for our friends this weekend and it was yummy.

The purists don’t like the idea of an oven baked risotto, but who cares…
It is very easy (a one pot meal), it looks great when it comes out of the oven, and tastes really delicious. And so as not to lose the theme of recent posts, another Mediterranean recipe for you, dear readers.

Start cooking the onions,
until soft.
Add garlic,
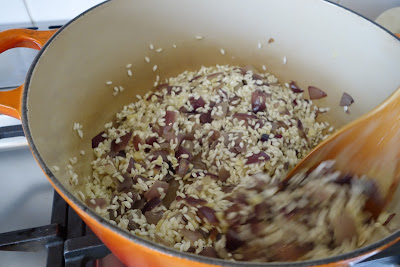
rice and stir.
Add white wine,
tomato paste, tomatoes and vegetable stock.
Sprinkle the olives and fresh oregano before placing it in the oven.
Once cooked, add mozzarella and let it melt in the oven.
Add rocket and remaining olives.

Drizzle with some olive oil and a squeeze of lemon juice...
and serve.
It was cooked to perfection.

Oven-baked mozzarella, black olives and rocket risotto

Serves 4


Ingredients


2 tablespoon organic extra-virgin olive oil

2 large red onions, roughly chopped
2 large garlic cloves, roughly chopped
225g Arborio rice
170ml dry white wine (optional)
1 tablespoon tomato paste
400g can of plum or chopped tomatoes
400g vegetable stock, plus extra in case it’s needed
1 teaspoon hot smoked paprika (or you can use 2 tsp of sweet paprika if you don't like it spicy)
5 sprigs of fresh oregano (about a palm full), chopped
160g pitted kalamata olives
125g organic mozzarella di bufala, pieces
50g organic rocket
Juice of half lemon to serve
Sea salt and pepper

Method

Pre-heat the oven to 180ºC.
Heat the olive oil, on a low medium heat, in an ovenproof lidded pan cook the onions until soft. Stir occasionally.
Add the garlic.
Add the rice and stir to coat in the juices.
Add the wine. Let it evaporate for 3 minutes.
Add the tomato paste, chopped tomatoes and the vegetable stock. Bring to boil, stirring occasionally.
Add the paprika and mix.
Add the fresh oregano and half the olives. Season.
Put the lid on the casserole. Bake in the oven for about 20 minutes or until the rice is al dente.
Take it out of the oven. If it looks dry, add a little bit more vegetable stock.
Scatter the mozzarella over the rice and drizzle with olive oil.   
Return the pan to the oven without the lid. Bake for 10 more minutes, until the mozzarella has melted. Take it out, rest for 10 minutes.
Serve it topped with the rocket leaves, olives, a drizzle of olive oil and a squeeze of lemon juice.
Enjoy it.

A healthy note: Mozzarella di bufala is a great source of vitamins, minerals and protein. Tomato stimulates the regeneration of liver tissue and tonifies the stomach. When it’s cooked or consumed with olive oil, avocado or nuts, it has been shown to increase its antioxidant properties. Rocket is a very good source of dietary fibre. It has very positive effects on the liver function and improves the blood quality. Olive oil contains essential fats, prevents oxidation of cholesterol, and helps prevent atherosclerosis and ischemic heart diseases, stimulates the secretion of bile, lowers levels of triglycerides, and regulates blood sugar.

Till next week! 
 
Share:

Thursday 4 May 2017

How to make sourdough bread

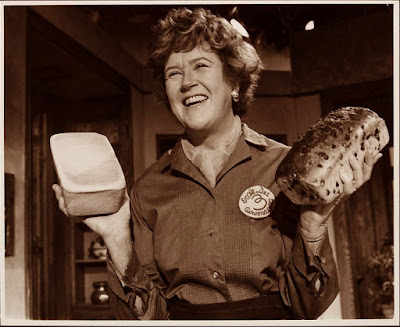
How can a nation be called great if its bread tastes like Kleenex?”  

Julia Child on factory made white bread

Egg and animal fat were once the forbidden foods, but after several studies they got the green light again. More recently, the new villains became gluten (a combination of two proteins found in wheat and other grains) and lactose (a type of sugar found in milk and dairy products). Studies have shown that these components can indeed cause inflammation in people with digestive disorder and autoimmune diseases, coeliacs, and people with behavioural conditions such as autism and ADD (Attention Deficit Disorder). But for the great majority, gluten and lactose derived from mostly organic ingredients, in a balanced diet, are harmless. I would recommend you to avoid the commercial white loaf, or those wholemeal breads that contain lots of additives and preservatives, and make your own. Otherwise, just find a good artisan bakery near you.

Last week I mentioned that a good way to enjoy my Greek salad was having it with a piece of sourdough bread. Learning to make it can be fun. To be honest, it can also be hair pulling, but the result is very satisfying.

Although sourdough bread has been around for several thousands of years, it became increasingly popular in the last decade. Michael Pollan has made it a little more fashionable with his brilliant Cooked series. I tried baking my own several times and never quite succeeded. But I was determined, and was encouraged by my friends - the amazing food writer/developer and nutritionist Neide Rigo, who makes the most delicious looking sourdough bread and writes my favourite blog in Brazil, come-se; and Brian, an amazing cook. Their tips and some research on my part kept me going.

I had some major failures but a mixture of Ken Forkish’s and Chad Robertson's methods finally gave me a lovely and exhilarating result. The whole family gathered around the loaf and cheered their first slice of still warm crunchy-crusted homemade sourdough bread. You can watch Ken’s videos here. Or a masterclass with Chad Robertson here, to understand the steps better.

After my baptism of fire, I decided to attend the brilliant Culinary Anthropologist, Anna Colquhoun’s hands-on bread course. With her, I learnt some important tips and techniques that have since given me confidence to bake more often. I encourage you to have a go at baking your sourdough loaf. Making bread is a work of love, persistence and patience. It’s also very therapeutic.

Starter - day 1
Starter - day 5

How I keep it in the fridge


How to make Sourdough Bread (Chad Robertson recipe, adapted by Anna Colquhoun)

The recipe is very long and the process too. Don’t be put off. Once you have a good starter you are very likely to obtain a good result.

First: How to make the starter

Ingredients for the starter

Organic rye flour or *organic wholewheat
Filtered or spring water

Day 1: Make the Initial Starter

100ml filtered/spring water
50g organic rye flour

Stir vigorously until combined into a smooth batter. Scrape down the sides and loosely cover the container with plastic wrap or a clean shower cap. Place the container somewhere warm and let it sit for 24 hours. 

Day 2: Feed the starter

75ml filtered/spring water
50g organic rye flour

Add the above ingredients to Day 1’s mixture and stir vigorously. Let it sit for 24 hours.

Day 3: Feed the starter

50ml filtered/spring water
50g organic rye flour

Repeat the instruction above.

Days 4, 5, 6: repeat the instruction as above. By day 5-6 your starter should be very active with lots of bubbles, smell yeasty and pleasantly sour. It should also have doubled its volume. 

*If you are making it with wholewheat flour:  
Day 1: 75ml filtered or spring water and 50g organic wholewheat flour
Day 2: yesterday's mix, 50ml filtered or spring water and 50g organic wholewheat flour
Day 3: yesterday's mix, 50ml filtered or spring water and 50g organic wholewheat flour
Days 4, 5, 6: repeat the instructions above.

How to maintain the starter

Once your starter is ready, you can maintain it by feeding it once a week, if it lives in the fridge; or every other day, if you keep it on the counter.

50-100g of starter (discard the rest or use it to make pancakes)
200ml filtered or spring water
200g flour (wholewheat, rye or a 50:50 mix of rye/wholewheat and strong white flour)


Mixing the levain with dough ingredients
Add the flours and mix until no dry patches appear
Now sprinkle the salt and remaining 50ml water

Doughs resting overnight in a proofing basket and a bowl
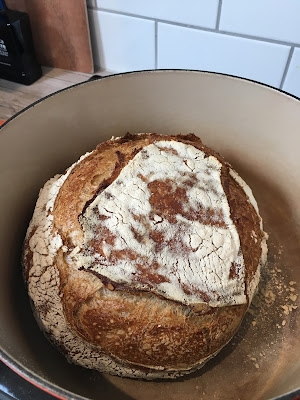
 Baked inside a heavy pot


First loaf, crunchy-crusted

Second loaf, looking good too

Still warm and ready to be devoured


Second: How to make the Bread
Makes 2 loaves

Ingredients

For the levain:

1-2 tablespoons active sourdough starter
200ml water
100g wholewheat flour 
100g white bread flour

Around 8-10 hours before you want to make bread, prepare the levain by mixing the ingredients thoroughly in a plastic tub. Leave at room temperature overnight, no more than 12 hours. It should rise and bubble.

If the levain is very bubbly, it's ready to be used. If you want to make sure the mixture is ready to use, drop a teaspoon of it into a glass of lukewarm water. It should float. If it doesn’t, repeat the process again.

For the dough:
200g levain, ready to go
675ml + 50ml warm water
800g white bread flour
200g wholewheat, spelt, malted or rye flour
22g salt
extra flour for dusting

Mix 200g of levain with 675ml warm water. Add the flours and mix until no dry patches appear. Cover with a shower cap or cloth and rest for 20 minutes. Sprinkle the salt and remaining 50ml water. Now is when you can add seeds, nuts, dried fruits, herbs, olives and etc, if you wish.  Mix with your hands until the dough feels hydrated. Use a scraper to clean down the sides of the bowl. Cover.

Let the dough rise at room temperature for 3-4 hours.

Every half hour, give it a series of turns (what the bakers call “folds”). Grab the dough at the top edge, lift it up, stretch and fold it to the centre, repeat all the way around the dough, moving clockwise. Let the dough rest 30 minutes. Repeat this process a total of 6 times, every half hour for a total of 2 1/2 hours. The dough will gradually become smoother and stronger.

Once you've finished the folds, let the dough rise undisturbed for 30 to 60 minutes, until it looks slightly puffed. This dough won't double in size the way regular, non-sourdough breads will; it should just look larger than it did when you started.

Sprinkle some flour over your counter and turn the dough out on top. Use a pastry scraper to divide the dough in half and to shape each one into loose rounds. Shape it round (or boule) by making a series of folds, using a little flour as above to create a smooth surface. Let it rest for 20 minutes.

In the meantime, line 2 bread proofing baskets, colanders, or mixing bowls with clean dishtowels. Dust them heavily with flour, rubbing the flour into the cloth on the bottom and up the sides with your fingers.

Flip over the boules and shape again. Transfer them to the baskets, seam-side up. If the seams are gaping pinch them closed. Cover with shower caps or damp towels. Let them rise at room temperature for 3 to 4 hours. Alternatively, place the covered basket in the refrigerator and let them rise slowly overnight, 10-20 hours. If rising overnight, bake the loaves straight from the fridge.  

Half an hour before you are ready to bake the bread, preheat the oven to 250C degrees and place a Dutch oven or a heavy ovenproof pot with a tight fitting lid inside. If you don’t have two pots bake one loaf after the other (leaving the second one in the fridge).

Carefully remove the Dutch oven from the oven, close the oven door and remove the lid. Flour the top of the dough and carefully tip the loaf into the pot so the seam-side is down.

Carefully and confidently use a sharp knife, or serrated knife to quickly score the surface of the loaves. Be careful not to burn yourself on the hot pot.

Cover the pots and place them in the oven to bake for 20 minutes. Reduce the temperature to 240C degrees. After 20 minutes, remove the lid, turn the heat down to 230C degrees and continue baking for a further 25 minutes until the crust is golden brown **. Remove from the pot and let it cool on a rack.

**P.S: to obtain a very good crust, I place a bowl or a small baking tray of hot water in the oven while the bread bakes. Another option is to fill a clean spray bottle with water when I take the lid off and spray the bread and oven.


My malted loaf made at Anna's workshop
It didn't only look pretty it tasted delicious too


A healthy note: Due to the long process of fermentation, phytic acid (an enzyme inhibitor) is neutralized and makes the bread easier for us to digest. According to a recent research project in Canada, there is new evidence to support sourdough’s superior effect on blood glucose levels, compared to wholewheat bread. Sourdough bread contains nutrients such as B vitamins (including thiamin, niacin, folate and B12), iron, zinc, magnesium, potassium and antioxidants.
Share:
© Margot's Kitchen | All rights reserved.
Blog Layout Created by pipdig